
On this page
Choose metadata when the folder follows a rule
Use Metadata Folders when a saved field should determine the destination: a photo’s capture date, camera model, or location, for example. RenameClick builds the path from those values without asking AI to choose a category.
For invoices versus contracts, choose AI Categories instead. For client folders that already exist, choose Match Folders. Metadata Folders is useful when you want the same available fields to produce the same folder path.
Compare the three organization methods before choosing a preset.
Pick the right date
| Source | Use it for | Check first |
|---|---|---|
| EXIF → Created | Camera photos organized by capture date | The created date is used when capture metadata is unavailable. |
| Created | Files organized by filesystem creation date | Copies and exports can have a different date from the original event. |
| Modified | Files organized by last modification date | Editing a document may change this value. |
A receipt’s creation date is not necessarily its purchase date. If you need the date printed inside a document, request it through naming instructions and check the extracted value. Metadata folder levels do not extract invoice fields from page text.
Build and save the folder levels
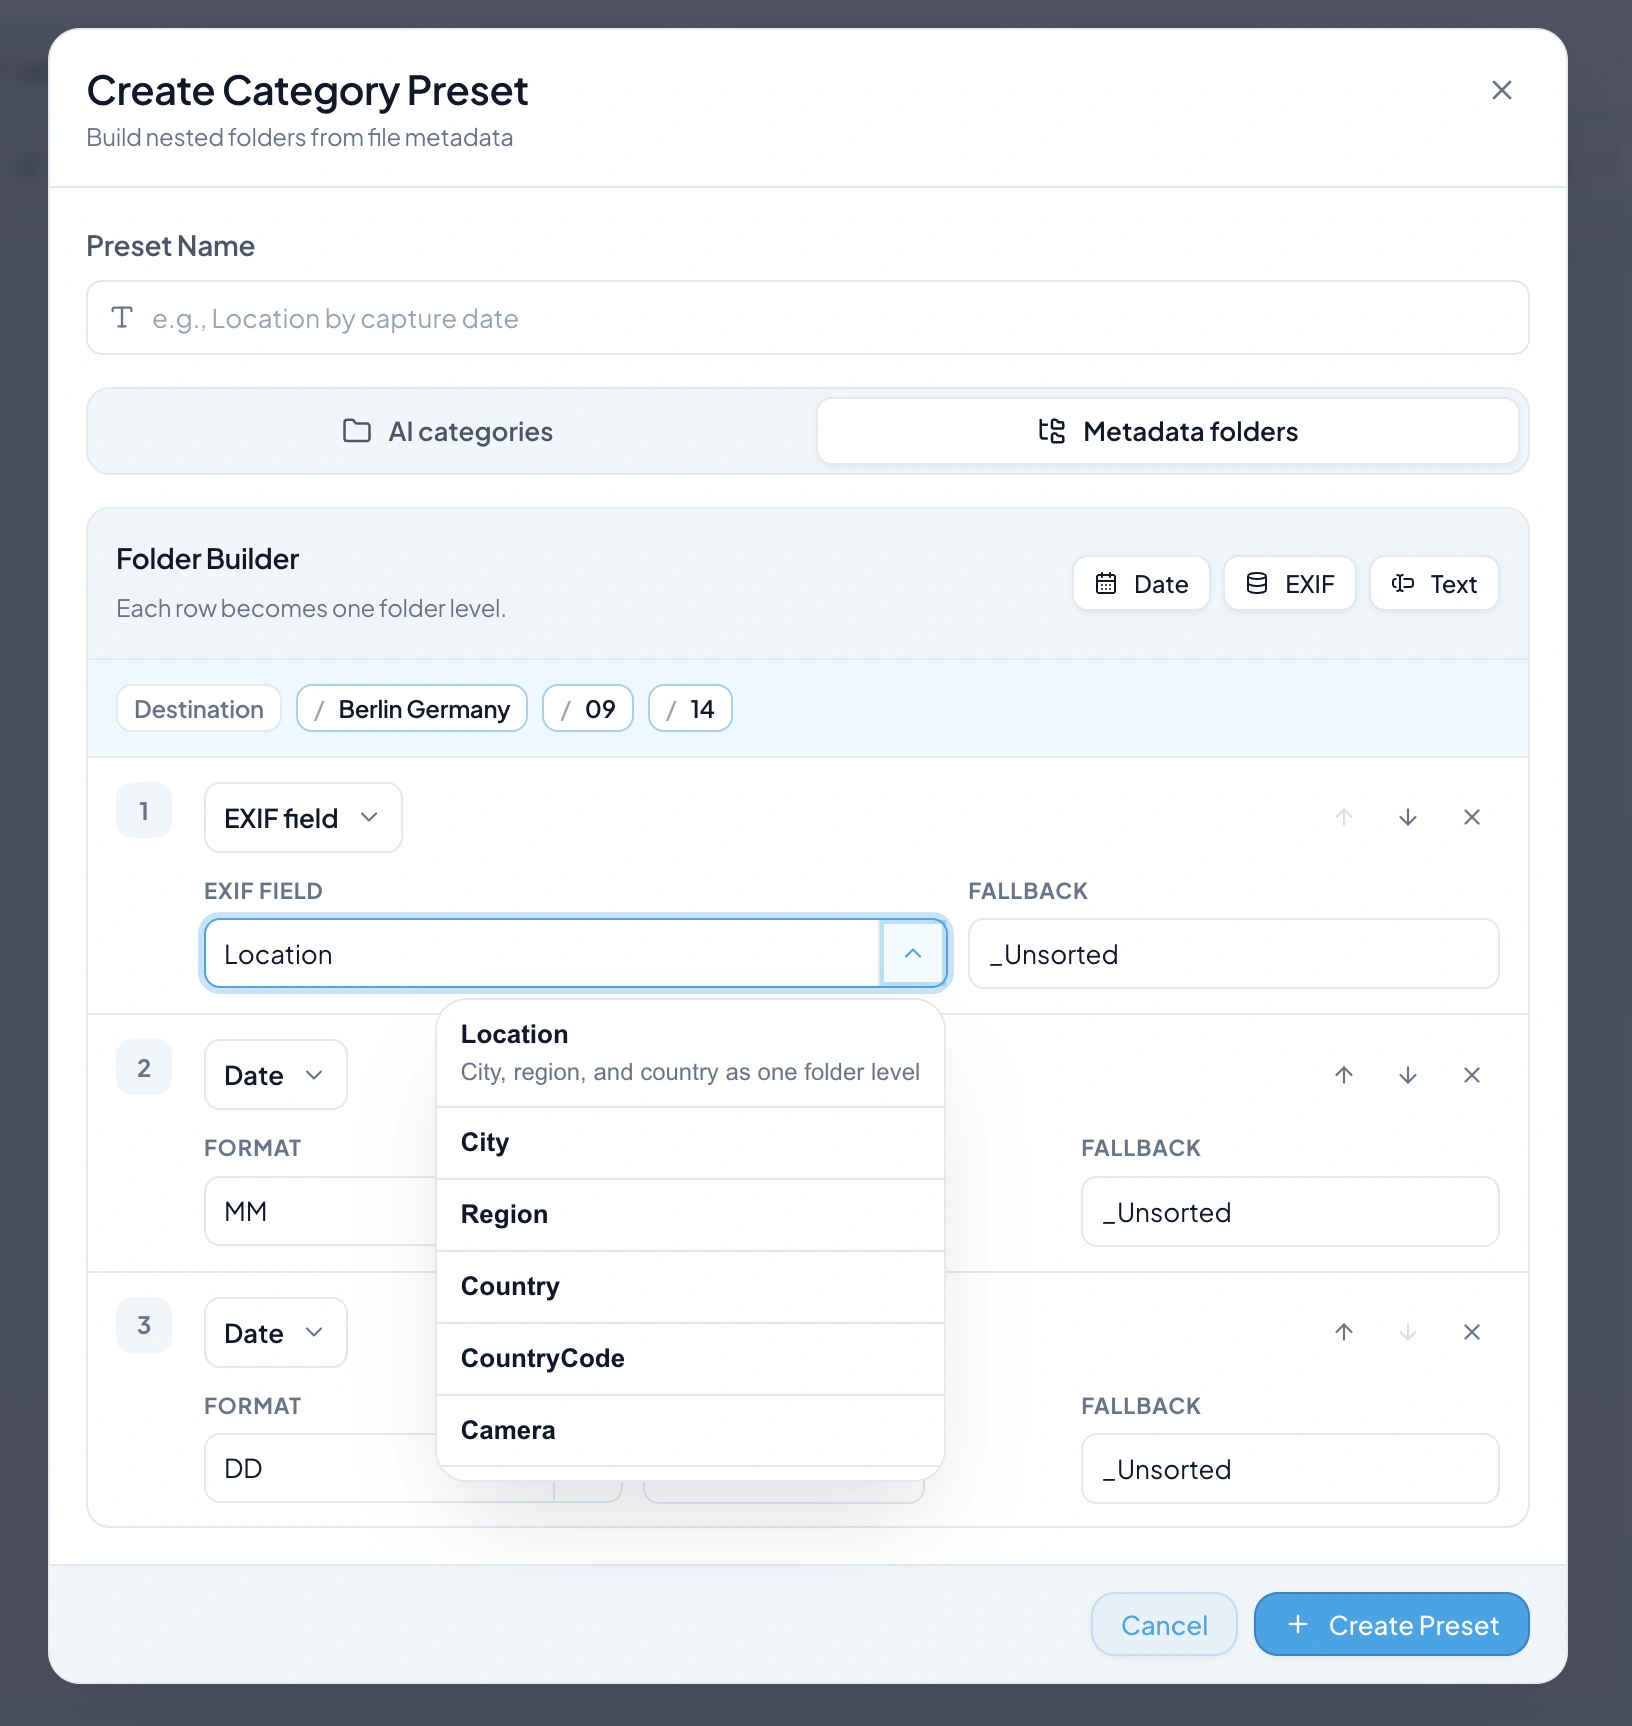
- Open Categorization and choose Create New.
- Select Metadata folders.
- Add a Date, EXIF, or Text level. Each row becomes one folder.
- Arrange the levels in the order you want to browse them.
- Set a fallback for fields that may be absent, then check the preview path.
- Save the preset and choose the destination for your files.
A Year / Month / Day structure uses three date levels. Add a fixed Archive level if you want that name above the dates. A Camera level can separate imports from different cameras without maintaining a manual category list.
The builder preview explains the structure. Check the destinations produced for your own files as well: the preview does not establish that every photo contains those fields.
Make missing values easy to find
Screenshots often have no capture location, and exported photos may have lost EXIF. Use a visible fallback such as _Unsorted or Unknown Location for an unavailable field.
Do not fill a missing city with a guess. A fallback folder lets you find those files later and decide whether a different preset is more appropriate.
See date sources and fallback settings for the full reference.
Check the path, then move the files
Choose Categorize only if the current names are useful. Choose Rename + Categorize if you also want descriptions in the filenames. Add the files, inspect the proposed destinations, and apply the selected rows.
Metadata controls the folder path; filename generation is a separate setting. You can keep camera IDs or add them to AI descriptions rather than discarding them.
See keeping original file IDs for the full reference.
Reuse the preset for incoming files
Select the saved metadata preset in an Auto Flow row, set its source and destination, and start with Auto Apply off. Once you have checked the paths for your imports, choose whether that row should apply future moves automatically.
See the Auto Flow setup guide for the full reference.